Keeping bicycle disc brakes clean is essential for safe riding, smooth braking, and long-lasting performance. Dirt, dust, oil, and road grime can accumulate on brake rotors and pads, causing squeaking noises or reduced stopping power. Fortunately, learning how to clean bicycle disc brakes is relatively simple with the right materials and techniques. Whether you ride a mountain bike, road bike, or hybrid bicycle, regular brake maintenance helps prevent unnecessary wear. This guide explains how to clean bike disc brakes, remove contamination, and maintain reliable braking performance.
Why Cleaning Bicycle Disc Brakes Is Important
Bicycle disc brakes work by pressing brake pads against a metal rotor attached to the wheel. Over time, dirt, moisture, and contaminants can affect the friction between these components. Regular cleaning helps maintain consistent braking performance and allows riders to identify potential mechanical problems before they become serious.
Prevents Brake Squeaking
Dirt, moisture, and uneven pad deposits can contribute to noisy brakes. Cleaning the rotor may eliminate temporary squeaking. However, persistent noise can indicate contaminated pads, improper bedding, or mechanical misalignment.
Improves Braking Performance
A clean rotor provides a suitable friction surface for the brake pads. Removing dirt and oily residue helps maintain reliable stopping power, especially during wet-weather riding or on challenging mountain bike trails.
Extends Brake Component Life
Regular inspection and cleaning help identify excessive wear, corrosion, and damage. Although cleaning cannot repair worn components, it can prevent avoidable contamination and support proper maintenance.
Tools and Materials Needed to Clean Bike Disc Brakes

Before cleaning bicycle disc brakes, prepare the correct supplies. Using inappropriate chemicals or dirty cleaning materials can damage components or introduce contaminants that reduce braking efficiency.
Essential Cleaning Supplies
- Clean, lint-free microfiber cloths
- Isopropyl alcohol, where approved by the brake manufacturer
- Mild soap and clean water
- Soft detailing brush
- Clean disposable gloves
- Bicycle repair stand (optional)
- Appropriate Allen keys for brake component removal
- Brake pad spacer for maintenance with the wheel removed
Cleaning Products to Avoid
Avoid WD-40, chain lubricant, oily degreasers, and general-purpose household sprays on braking surfaces. Some automotive brake cleaners can damage bicycle brake seals or painted parts.
Always check the instructions for your specific brake model before applying chemicals.
How to Clean Bicycle Disc Brake Rotors

Cleaning bicycle disc brake rotors is one of the easiest maintenance procedures. The rotor is the circular metal disc attached to the wheel. It must remain free from oils and grease to provide dependable braking.
Step 1: Prepare the Bicycle
Position your bicycle securely on level ground or a repair stand. Allow the braking system to cool completely if you have recently ridden.
Inspect the rotor for obvious damage, excessive wear, or deformation before beginning.
Step 2: Remove Loose Dirt
Use a clean, dry microfiber cloth to wipe away loose dirt and brake dust. Carefully rotate the wheel by hand while keeping your fingers away from pinch points.
Avoid transferring grease from the chain or drivetrain onto the rotor.
Step 3: Clean the Rotor Surface
Apply a small amount of manufacturer-approved isopropyl alcohol to a clean cloth. Wipe both sides of the rotor’s braking track, removing visible dirt and oily deposits.
Use a fresh section of cloth when necessary to avoid spreading contamination.
Step 4: Allow the Rotor to Dry
Let the rotor air-dry completely. Inspect the surface for remaining contamination and repeat the cleaning process if necessary.
Before riding, test the brakes at walking speed in a safe location.
How to Clean Bicycle Disc Brake Pads
Brake pads generate the friction needed to stop a bicycle. Unlike metal rotors, their friction material can absorb oil and grease, making severe contamination difficult to reverse.
Understanding when to clean and when to replace brake pads is important for bicycle safety.
Inspect the Brake Pads
Remove the pads according to the manufacturer’s instructions if a detailed inspection is required. Look for uneven wear, glazing, cracks, or signs of oil contamination.
Pads worn below the manufacturer’s minimum thickness must be replaced. For example, Shimano specifies a minimum friction-material thickness of 0.5 mm for certain models.
Remove Surface Dust
Use a clean, dry, soft brush to remove loose dust from otherwise healthy brake pads. Keep fingers, lubricants, and oily cleaning cloths away from the friction material.
Avoid soaking pads in cleaning products or attempting to restore contaminated friction surfaces with heat.
Replace Contaminated Pads
If brake pads have absorbed chain oil, hydraulic fluid, or grease, replacement is generally the safest solution. Clean the rotor, eliminate the contamination source, and install compatible new pads.
Follow the recommended bedding-in procedure afterward.
How to Clean Disc Brakes Without Removing the Wheel

Routine bicycle disc brake cleaning usually does not require removing the wheel. This method is convenient for road bikes, mountain bikes, and hybrid bicycles needing basic maintenance.
Clean Accessible Rotor Surfaces
Position the bike securely and wipe the exposed rotor braking track with a clean cloth lightly dampened with an approved cleaner. Rotate the wheel carefully to reach the remaining sections.
Keep your hands clear of the caliper and spinning spokes.
Remove Dirt Around the Caliper
Use a soft brush to remove loose dirt around the outside of the caliper. Avoid forcing dirt into the brake mechanism or spraying cleaning liquid directly into the pad area.
Check Brake Operation
Once the components are dry, spin the wheel to check for unwanted rubbing. Apply the brake lever several times and verify that the wheel stops consistently.
If the brakes feel weak or the lever behaves abnormally, investigate before riding.
How to Clean Hydraulic and Mechanical Disc Brakes
Hydraulic and mechanical bicycle disc brakes use similar rotors and pads, but their operating mechanisms differ. Understanding these differences helps prevent accidental damage during cleaning.
Cleaning Hydraulic Disc Brakes
Hydraulic systems use brake fluid to operate caliper pistons. Clean the outside of the caliper and exposed accessible surfaces with manufacturer-approved materials.
Never open hydraulic fittings or remove pistons during routine cleaning. If fluid leaks or the lever feels unusually soft, professional service may be required.
Cleaning Mechanical Disc Brakes
Mechanical disc brakes use cables to activate the braking mechanism. Remove external dirt around the caliper and inspect the cable housing for damage or corrosion.
Keep cable lubricant completely away from the rotor and brake pads. Cleaning the braking surface follows the same basic procedure as hydraulic systems.
How to Clean Contaminated or Squeaky Disc Brakes
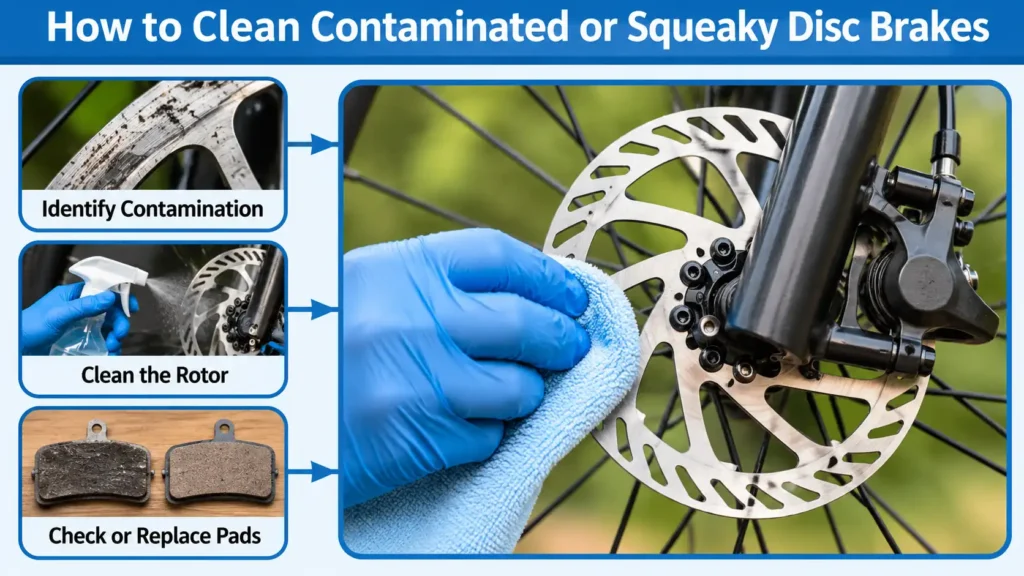
Contaminated disc brakes can produce loud noises, reduced stopping power, or inconsistent friction. Cleaning the rotor may solve minor dirt-related problems, but contaminated pads often require replacement.
Identify Brake Contamination
Common warning signs include:
- Persistent squealing during braking
- Noticeably reduced stopping power
- Visible oil or grease on the rotor
- Brake noise that remains after drying
- Unusual friction or inconsistent braking
Clean the Rotor and Inspect the Pads
Wipe the rotor thoroughly with approved isopropyl alcohol and a clean cloth. If oil has reached the pads, replace them rather than relying on repeated cleaning.
Check the caliper for a hydraulic leak or another source of contamination before installing new pads.
Bed In Replacement Pads
New pads require controlled braking to establish a consistent friction layer on the rotor. Follow the brake manufacturer’s instructions, using repeated moderate stops without locking the wheel.
If noise continues after correct cleaning and bedding, inspect rotor alignment and component condition.
How to Remove Rust From Bicycle Disc Brakes
Bicycle disc brake rotors can develop light surface rust after exposure to rain, humidity, or long periods of storage. Minor discoloration may disappear through normal braking, while severe corrosion requires closer inspection.
Cleaning Light Surface Rust
Inspect the rotor to determine whether the rust is superficial. Clean away loose dirt and moisture, then test the brakes carefully in a safe location.
Light surface oxidation on the braking track may disappear after several controlled stops. Do not apply oil, rust converters, or abrasive household cleaners.
When to Replace Rusty Rotors
Replace rotors showing deep pitting, structural damage, severe corrosion, or thickness below the manufacturer’s minimum. Cleaning cannot restore a rotor that has become structurally unsafe.
How Often Should You Clean Bicycle Disc Brakes?
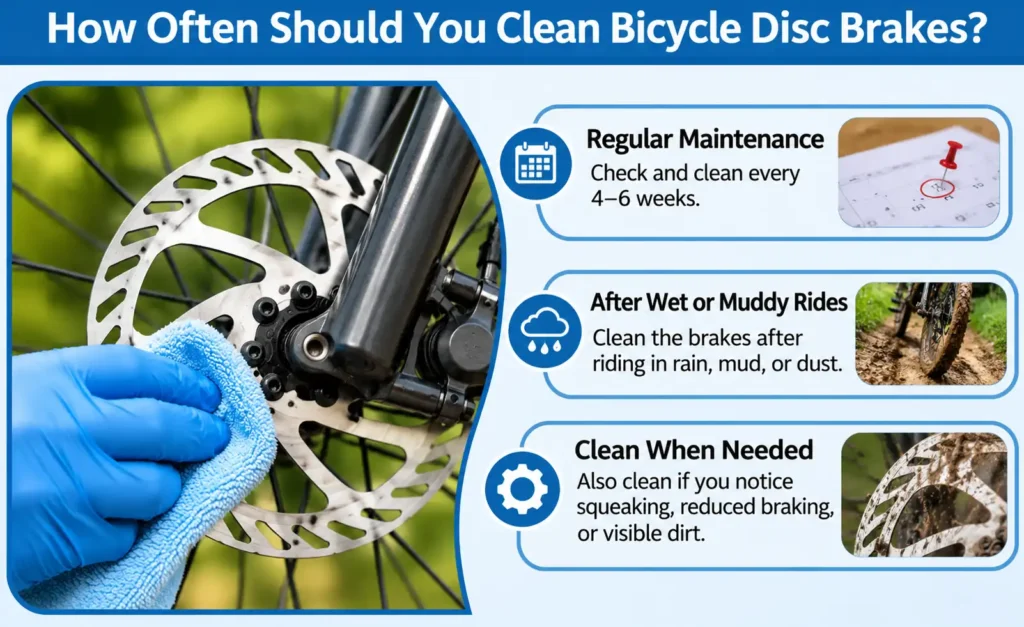
The ideal cleaning frequency depends on riding conditions and exposure to dirt, water, and contamination. Mountain bikers riding muddy trails may need more frequent cleaning than road cyclists riding in dry weather.
After Muddy or Wet Rides
Remove heavy dirt and inspect the braking system after muddy rides. Dry the bicycle thoroughly to reduce corrosion and prevent residue from accumulating.
During Routine Bike Maintenance
Inspect the rotors and brake pads whenever you wash or service your bicycle. Clean the braking surfaces when they become dirty rather than following an unnecessarily aggressive cleaning schedule.
Signs That Cleaning Is Necessary
- Visible dirt or oily residue on the rotor
- New squeaking after dirty conditions
- Mud or road grime around the calipers
- Reduced braking performance
- Heavy residue following bicycle washing
If cleaning does not restore normal braking, inspect for damaged or worn components.
Common Mistakes to Avoid When Cleaning Disc Brakes
Improper maintenance can make bicycle brakes less effective and create unnecessary safety risks. Avoiding common mistakes is just as important as using the correct cleaning technique.
Using Oil-Based Cleaning Products
Never apply chain lubricant, grease, or ordinary penetrating oil to brake rotors or pads. These substances can severely reduce braking friction.
Touching the Rotor With Greasy Hands
Natural skin oils and grease from maintenance work can transfer onto braking surfaces. Handle rotors by their non-braking areas and use clean gloves when appropriate.
Squeezing Hydraulic Brakes With the Wheel Removed
Pressing the brake lever without the rotor or an appropriate pad spacer installed may push hydraulic pistons outward too far. Install a suitable spacer whenever the wheel is removed.
FAQs
1. Can I clean bicycle disc brakes with isopropyl alcohol?
Yes. Isopropyl alcohol is commonly recommended for cleaning bicycle disc brake rotors, including by SRAM. Apply it to a clean, lint-free cloth and wipe the rotor carefully. Always check your brake manufacturer’s cleaning instructions before use.
2. How do I clean squeaky bicycle disc brakes?
Start by cleaning the rotor and checking the pads for dirt or contamination. If squeaking persists, inspect the bedding-in condition and caliper alignment. Oil-contaminated pads may need replacement, as cleaning alone cannot reliably restore their braking performance.
3. Can I clean disc brakes without removing the wheel?
Yes. Routine rotor cleaning can usually be completed with the wheel installed. Use a clean cloth and a manufacturer-approved cleaner on accessible rotor surfaces. Removing the wheel may be necessary for detailed pad inspection or caliper servicing.
4. Can I use WD-40 to clean bicycle disc brakes?
No. Standard WD-40 is a penetrating lubricant that can contaminate brake pads and reduce braking friction. Use the cleaning method recommended by your brake manufacturer, and keep all lubricants away from rotor braking surfaces and pad friction material.
5. How often should bicycle disc brakes be cleaned?
Clean disc brakes when they become dirty or contaminated, especially after muddy rides or exposure to road grime. Regularly inspect rotors, pads, and calipers for wear or damage. There is no universal cleaning interval suitable for every cyclist.
